
Watch the video on Youtube here - https://www.youtube.com/watch?v=U9kds0hO8Is
The outdoors has always been a major interest for me from as far back as I remember, and with my diary now being crazy, finding time just to get on the bike is always a challenge. So camping and being at one with the elements has taken a back seat for some time, until now.
Bikepacking is an emerging genre that has taken the cycling world by storm, it clearly helps combine that time in the saddle with outdoor life. If a release is what you’re looking for, bikepacking is a great way of finding it. But where there’s a project, there’s planning required, and the world of bikepacking is no mean feat in this regard. There are more forums than you can shake a twig at, with every bit of advice you could desire, all of which contradicts what the next person says. Which bike should you use? Tyres? Saddle? Bags? Equipment? The list goes on.
WHAT DID I TAKE WITH ME?
My initial consideration was to buy a new gravel bike, something lighter than my MTB and a little more “nimble”. However, from a long-term perspective I will likely be going on more local bikepacking excursions. So when thinking about the type of tracks that I would be riding the most, it became apparent that a gravel bike might not be the best type of frame and tyre size to ride over some of the obstacles. There are few pure gravel tracks in Yorkshire, most things at some point require off-road capability and with the weight your kit loads on the bike, I concluded that narrower tyres and fixed frame combination would impose some restrictions.
With that in mind, and given that I can lock-out my suspension blocks for a hardtail experience should I need it, I decided I’d stick with my MTB. So then on to considering what bags I would take. I don’t like weight on my handlebars, I find it really affects the handling of the bike so I started hunting for rear mount systems instead. There are loads available, with more opinions than options! The trick is to filter out the noise – what do you have, need and prefer? I needed the versatility of using full suspension and my dropper seat post for the descents. With this in mind, I was immediately able to eliminate any system that attach to, or impedes the movement of the dropper post as well as the saddle. After I’d spent quite a long time figuring this out, it left only a couple of options available; a Thule system, and www.aeroe.com – which is what I decided on.
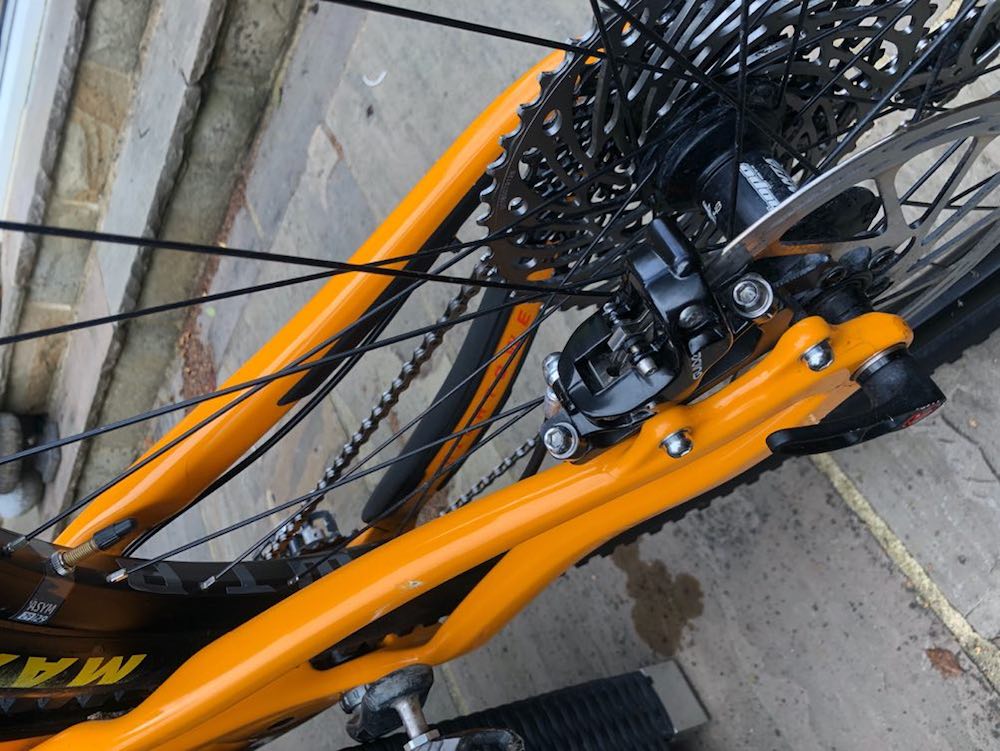

The Aeroe system attaches directly onto the rear stays of the bike with a 4-point harness around the frame. This makes it solid (no wobble) and can carry up to 17kg’s on the frame itself (I was loaded to about 7.5-8kg’s in total). Pods attach to the frame (I went for the 11ltr option) on the outside that are fully adjustable and revolve to suit your preferred angle, and space on the top for a dry bag. It’s worth testing out your pedals to make sure they’re not obstructing.

So the bags are sorted – what next?
“Make sure you’re not cold, wet or hungry” was the mantra I adopted to tackle the planning of my camping gear. Again, there are a million options available. Space, weight and of course cost will guide you in your natural direction. However, it’s worth considering that you do get what you pay for, and some companies are very well practiced at having tested the right fabrics and fit for the task in hand. After looking at many, I centered around www.alpkit.com who have something for every scenario. My kit list from Alpkit included:
- Sleeping bag (400) – warm for most British conditions
- Bivvy Bag “Elan” – this is a good option as it sits between a tent and bivvy bag, with poles that raise the end of the bivvy bag up so it’s off your face and allows you to close it completely for all weather protection.
- “Cloudbase” sleeping mat – 2 minutes to blow up and no time at all to deflate. Very comfortable.
- Silk Sleeping bag liner – keeps the inside of your sleeping bag clean while providing an extra few degrees of warmth if needed
- Alpkit tent pegs – a “3 point” peg that holds much better than a standard peg
- Lightweight packable waterproof hooded jacket – one that is designed to ride too for full flexibility
- Packable down jacket – for nights sat around the fire
- “Dream” pillow – an inflatable pillow. I was amazed at how comfortable it was.
- Tarp – I didn’t use mine and wish I had as the rain woke me at 3am, which would have been avoided if I’d just spent 10 minutes getting it in place over my sleeping area. It would have also been vital to remain dry when out of my bivvy should it have rained the next morning. I will certainly erect it next time.
Now for the important bit – food.
I would say not to skimp on things that are important to you – if you want sweets, cake, pies, take them! If dehydrated food is your thing, stick it in your bag, there are so many options.
I took a combination of:
- Trek Peanut crunch energy bars – these are delicious!
-
'Expedition Foods' dehydrated beef and potato hotpot – this is tastier than you think but does require a lot of water. Great if you’re surrounded by snow somewhere, but meant I had to spend more time cleaning water to get a coffee for lunch at the same time.

-
Wayfayrer 'wet food' - cook from the packet type food which will likely be my go-to option going forward as it packs quite small by comparison to the hotpot, can be cooked straight in the pan without additional water, it’s real food so tasty and still packs enough calories. They also do a sticky toffee pudding option!

Now on to the cooking. There are a number of options, and so I did the best form of research here and talked to people about what they have used. A good friend of mine does a lot of ‘adventure canoeing’ and has tried everything. His go-to choice is the Primus cooker, so I went with that. The most talked-about cooker tends to be the ‘pocket rocket’ which one of our group had and the difference was noticeable. The primus is constructed with a filament around the base of the pan, and comes with a windbreak that attaches by magnets to the burner. The result being that water boils within about 1.5 minutes, saving huge amounts of gas and gets you a piping hot meal or drink in no time at all. What you pay extra for this little beauty is easily gained by what you save in gas and time, although it is a little larger than other cookers, it still easily fits inside a dry-bag or 11ltr pod.

In terms of clothes to take it’s generally based on whatever you need or can fit in and for how long you’re going. As I expected to be wet and dirty by the end of the day, I planned to change into my clothes for the next day on the night and pack some skiing long-johns to keep me warm overnight.
Here’s the clothes I packed for one night’s camping:
- 1 pair of Long-Johns
- 1 riding top
- 1 long sleeve base layer
- 1 pair socks!
- Wooley Hat
A few really useful additional items were:
- Micro towel
- Small shovel/trowel
- Twine/rope for tarp erection
- Swiss army knife
- Firelighters
- Tic remover
- Mosquito repellent
- Midge head net
- Chargeblock for iPhone etc
- Headtorch
- Water Filter
Watch the video on Youtube here - https://youtu.be/zaHqO5rHnYI
WHAT DID I DO?
Day 1:
https://www.strava.com/activities/4036792238
No prizes for guessing why we came up with this name for that ride!
Anyone who’s visited the Scottish Highlands knows they are gnarly, angry pinnacles of rock that stand out of ‘flat’ valley floors, like guards straight out of a Simbad movie. As you, slowly, ascend them, it’s like they’re looking at you permitting your passage. But as the weather swirls and changes multiple times, you know it’s only a matter of time until their patience runs out and you’ll be slammed with a storm. We saw most weathers over this ride, but it was an ‘out and back’ route returning us to a hotel that night, so didn’t need to do full bikepacking.

I only needed to pack my cooker, some food, my waterproof and down jacket so I only needed the dry bag on the Aeroe system. The mistake I made was that I didn’t pack it tight enough, meaning I broke a couple of elements of my Primus L. The descents were pretty awesome, fast and rutted, and I hadn’t accounted for that in my packing!
The ride was awesome, it’s a very manageable track in both directions other than approx. 50 meters where pushing/carrying is required. The rest is a rideable, technical single track that really encourages you further. The run off the back side down to Applecross is spectacular with the sea in the distance and the roll down the valley. Well worth a visit!


Day 2:
https://www.strava.com/activities/4042783959
We travelled further north to Golspie trail centre (https://www.visitscotland.com/info/see-do/highland-wildcat-trails-golspie-p317471) which boasts the longest descent on any UK trail site in the UK at 7km. We stuck to the black route and boy what an impressive climb it is. The views are amazing up through heather coated forest floors as the trail twists and turns its way up the hillside. It’s a technical ‘do dab’ challenge on a well-hidden purpose made trail that tests even the most accomplished rider, but it’s all rideable with effort and gumption.
When you think it can’t get any better, the descent throws you challenges that test your nerve to the extreme. Thankfully there a ‘blue’ run-offs around the hardest of obstacles so if you’re not quite feeling like meeting the master that day, you can take a slightly easier route.
The trail twists down through a fairy glen forest of high fir trees and brilliant green moss covered ground. Into some awesome berms, table tops sweeping, undulating smooth tracks. Imminent death feels like it’s just around the next corner but the trail is manufactured to a high standard that helps keep your bike moving in the right direction. I’m not the fastest descender but the trail sucks you in and with a little more confidence you can test and develop your skills quickly, leaving your arms and legs shaking with adrenalin (and exhaustion) by the time you drop back into the car park at the bottom.


After the trail, the perfect reward was fish and chips on the coast just 500meters away, before heading for bikepacking that night around the coast.


Day 3:
After clearing the camping spot so no-one could tell we’d ever been there (as responsible bikepackers should do), we headed south to Dunkeld:
https://www.strava.com/activities/4044298265
A short but taxing ride, especially after the previous days. The ride was very short at just over 5km in length but don’t be fooled by the distance. The climb to begin is 3.5km in length, yet ascends 276 meters, topping out at 39.3% on one short section. It may be short, but it’s a stinker!
The descent is fast and furious and you have to be on your guard the whole way down. It’s partially rocky but the main obstacles are tree routes that crisscross the narrow and gnarly track all the way down. Consequently, I didn’t get any pictures of this section as it requires complete concentration all the way down. We were thankful it was dry at least, attempting either up or down on this run tests your stamina in every sense!
That was it for a couple of us, we were done. A couple of the lads went and did one or two other options that tested them further whilst we went for a nap! We met shortly after for that very welcome pint (or few) to end a few days of awesome riding, camping, good conversation and of course beer.
Having the right kit with you, from bike to water filtration system, removes a lot of the stress on a trip like this. Preparation is everything, take the time you need to do this as thoroughly as possible, it’ll make your trip (and future ones) all the better.
0 comments